Cutting Bolts With A Hacksaw To Make Studs

image

Why Cut Bolts?

There are a few reasons why you may choose to cut a bolt.  One may be that you need and unusual length that is just not mass produced and too expensive to have it custom made.  Another reason, is you could be needing a certain bolt length on a weekend, holiday or a weird hour of the night.  In that case, it might be more practical, for example, cut a 4 inch bolt down to a 2 inch bolt rather than suspend a project just to by the right length of bolt.  A third reason, one most concerned with here, is you need a threaded stud to weld into a project and need the bolt head removed.

image

Secure Bolt Into A Vice

When setting up to cut a bolt, first you have to tightly secure it so it will not move while the teeth of the hacksaw blade are cutting into it.  If you need to protect the threads from damage, the easiest thing to do is screw on two of the appropriate sized nuts.  When all the corners of the hex nuts line up, you simply put the assembly into the vice and tighten it.  Square nuts might actaully be a little easier for this technique.  Now you may notice the bolt has some play and will spin within the nuts.  This is especially true if you are dealing with the SAE coarse threaded hardware.  It is imperative that you fully secure the bolt still or the hacksaw blade will not have a chance to cut.

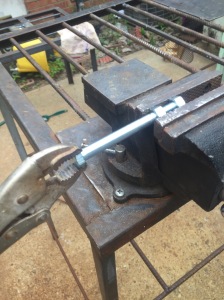
As seen from the photo above, a simple solution to the problem of securing the bolt is to clamp vice grip pliers on the head of the bolt and hold with one hand.  Then one simply needs  to use the other hand to operate the saw.  Make sure the teeth are pointing away from you and use at a downward angle fashion.  The video below will give you a better visual of this.


image

Quality Of The Hacksaw Cut

You may ask, why would I want to use a hacksaw anyways if there are so many powerful power tools available that will do the job quicker and with less labor?  The quick answer is quality and precision of the cut.  Abrasive wheels used in power saws and grinders have a thicker curf as not necessarily making a clean cut.  Reciprocating saws are bulky and are notorious for being inaccurate.  Portable bandsaws are also cumbersome and expensive.  A hacksaw, even a good brand, is usually less than $20, is light weight, and the blade can be installed in other configurations allowing cuts from unusual angles.  The replacement blades are very cheap also.  As seen from above photo, the cut needs minimal dressing with sandpaper or a file.

image

Keep Remaining Bolt Heads

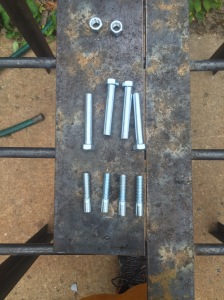
I feel it is best to keep the left over bolts for later use.  In the case of the studs I was making for a project, the left overs where nearly two inches long.  These can be reused as makeshift pins for temporary securing devices and fixtures, or as blanks for threading new screws.  So each four inch bolt I cut has the potential to become two separate fasteners.

Threading Metal Part 1

Years ago, I worked for a conveyor company and I learned a few metal working skills.  One of the more useful skills was threading pre-drilled holes.  Threading blind or through holes is called tapping.  With this technique,  you can have a threaded hole where ever it may be needed.  You can use bolts, screws, and threaded rods to fasten metal, wood or plastic to the object with the threaded hole.

The way it works, is you drill a hole with recommended size of drill bit and then you usually tap by hand.  Typically, you turn the tap in the hole about a half turn clockwise then backing off a quarter turn to clear chips generated.  It can be a slow process but it is worth the effort and patience.

Usually when I finish the initial tapping,  I completely remove tap from threaded hole and reinsert it to clean up the shavings and chips.  Then I test with a bolt of the same diameter and thread count.

image

The photo above shows me testing my angle iron bracket with a 2 1/2″ long 3/8-16 thread hex bolt.  I have completed four of these now an am ready to assemble my table.  That is the reason I enjoy tapping despite its labor intensive qualities.  Not only are you able to create strong cold connections in metal, but you can make your own personalized hardware for your next project.

Portable Welding Table Part 2

I’ve got the other seven rungs welded onto the table top. On the first row I only measured the very first one. The other three, I merely just eyeballed the measurements as they were not supercritical. I spaced him out evenly so I could what cut off pieces drop through the table if necessary. Also, this gives space for cut off tools I need to go below table little while anchoring the work piece to the table. The other four rungs on the other side were merely just lined up with the opposite side to make it look like a continuous rod going across entire table top.

image

I did have an issue with the little wobble. So what I did was remeasured the links of the legs as they were welded onto the table. It turned out that the only one leg one is about a quarter inch off. The other two legs were maybe maximum 1/8 of an inch off on the length.  So I mark and cut off the excess grinder on the three legs and I set it down on the flat service it was almost perfect.

image

Above you can see the table with a quarter inch thick plate resting on three of the rungs.  This shows the versatility of the table.   With this kind of modification, I can work with small pieces as well as larger pieces.


A Handmade Compass for DIY’er

image

A Compass That is Not Cheap Plastic Junk!

For a long time I have been frustrated by the disappearance of the all metal compasses that you could by at any craft store.   They have been replaced with cheap plastic garbage.  What’s more is most, if not all, are only able to hold small number 2 pencils.  If you want a compass that will hold a sharpie or a fat piece of chalk, you are out of luck.  Well, I found this amazing Youtube video below and I was immediately inspired.

image

Body of the Compass

The main components are two 3 inch circles of 1/8″ steel sheet and two 15 inch steel round bars 3/8″ thick.  This project is completely scalable.  I used a hole saw to cut out the disc since I would already have a 1/4″ hole drilled in the middle.  Of coarse if you do not have this available to you, you could cut them out with a jig saw or grinder.  Jig trace the lid of a Gatorade bottle or bottom of a drinking glass.  On the far right is a piece of plastic

shim stock shaped like the metal disc.  This acts as a bushing between the plates to reduce friction for the pivot point.  Before welding this all together, I will need to take one of the rods and put a point on it.  I used a cheesy bargain bench grinder and just kept spinning the rod to get a centered and even point.  It took about 15 minutes.

image

image

Next I needed a holder for the marker, pencil, or chalk I would be using.  I chose this scrap 1 inch tubing I had around.  The plan is to get the writing took in one corner and a bolt comes in from other corner and applies pressure to keep it set.  To accomplish this I had to grind one corner of the tube while it was in a vise.  This flattened surface allowed me to use a drill with a 5/16″ bit and drill a hole into the tube.  Once that was completed, I rest a 1/4-20 nut over the hole and inserted a screw to protect the threads.  I used my wire feed welder to weld the nut in place.  It was a pain in the butt but still easier than bring out tap and threading new wholes in the corner of a tube.

image

Thumb Screw Marker Holder

This is a large piece of tubing for this job and that thumb screw is industrial quality.  This holder set up will hold a lot of writing tools.  Once the holder was welded on.  It was time to weld the rods to the pivot discs.  Then a 1 inch 1/4-20 bolt was inserted in the pivot center and a lock nut was fastened on until the correct tightness was achieved.

imageimage

Setup for Use

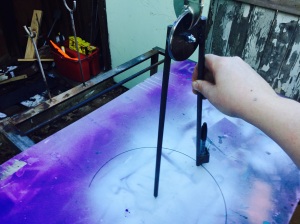
Once everything was assembled it was time to try it out.   First a sharpie was inserted in holder and tightened in place so the tip was roughly even with the point.  Then the pointed end was aligned to zero on  a large square and the pivot was adjusted until the marker tip reached the 6 inch mark on the square.  Then a pair of locking pliers was locked onto the pivot to keep measurement.  A scrap piece of painted aluminum sheet was laid out and a 12 inch diameter arc was drawn perfectly.

image

Improvised Welding Jig

2014-07-20 22.12.40

Scrap Steel Becomes Improvised Jig

I had cut some triangles out to make two four sided pyramids.  To be able to weld them in place, I needed a steel support to hold them at the right angle.  That is where I remembered the four quarter inch thick steel bars I had laying around.  I realized the bottoms of the triangles would form a square.   Once I had the right configuration, I clamped the bars in place and proceeded to tack weld the triangles together.  I was able then to weld without worrying about damaging the jig.

2014-07-20 23.39.04

Here is a view of the pyramid with seams welded.  I made another pyramid and put it under the other and made the bars closer together.  This is to hold the first pyramid upside down while the other is welded to it.

The photo below shows the underside of the workstation.

2014-07-20 23.39.11


Jig for Straight Cuts in Metal With Jigsaw

2014-05-25 12.04.342014-05-25 12.04.55

Jigsaws Can Cut Straight With a Guide

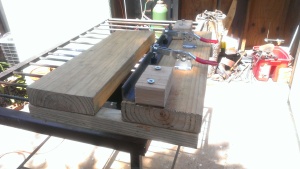
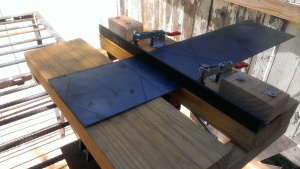
Talk about jigsaws  to anyone and immediately they will respond with comment on how it can cuts curves.  In general, this is pretty much true.  It is difficult to get a jigsaw to make reliable straight cuts over and over.   The exception to this rule requires a specially made jig.  Cutting metals with a jigsaw can produce some of the nicest cuts.  So I made the jig pictured above mostly from scrap wood.  You can make one from steel but it will be real heavy and a pain to drill all those holes.  Essentially I started with two 18 inch long 5 X 2 boards.  I also had some 2 X 2 so I can bond the support table with the clamping table.  There is also a 2 X 2 screwed to the bottom of the heaviest side of the fixture for securing the whole thing in a bench vise.  I cut off two ends from a 2 X 4 to make two stops.  An eighteen inch piece of 1 inch angle iron is the brace that holds down the sheet metal.  The magic is in the toggle clamps I bought from amazon mounted so they clamp down on the angle iron holding the sheet metal in place.  Once I looked it over, I realized that I mounted the clamps too close together.

2014-05-25 12.21.40

I moved one of the clamps over a few inches.  I may build a bigger jig for cutting larger sheets but I really do not like the idea of really long cuts with a jigsaw in metal because it takes too long.  So anyways, this little fix only took five minutes.  At least I can get sheets in there if one of the dimensions is 6 inches or less.

2014-05-25 12.21.302014-05-25 20.31.08

Simply Clamp Metal and Line up Cut

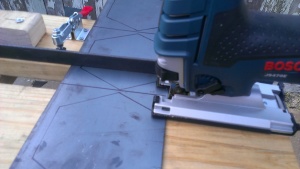
The clamping table and the support table are spaced 2 inches apart.  I have a Bosch jigsaw and the distance from the blade to the edge of the shoe is one and a half inches.  The idea is you clamp sheet metal down under the angle iron when the cut you wish to make lines directly up with the blade when the shoe of the jig saw rest against the iron.  Turn on the saw anc make sure it stays against the angle iron fence.

2014-05-25 20.31.04

If the sheet is really thin material then maybe you will need to clamp it down to the support table also to keep vibration to a minimum.   Having a welding table that has an open top makes setting my saw aside convenient while I line up the other cut.

2014-05-25 20.59.53

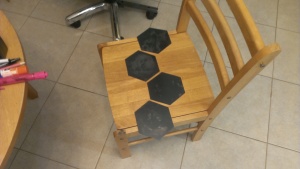
After a long evening of cutting, I finally got the raw pieces from my first project with this jig.   These are 4 hexagon shapes I will be using to make a decorative wall clock.

2014-05-25 21.58.38


Small Tabletop Heating stand for heating and enameling

IMAG3086

Convenient Hands Free Stand for Heating

I recently obtained a couple of jars of Thompson Enamel that I want to apply to copper.  I had some scrap hex steel bar and some left over square bar.  I hand bent two equal length hex bar sections into brackets that were welded together to form a square frame with rounded corners.   The legs were made from 1/4 inch square steel bars.  It stands a little over 9 inches tall.  This is a perfect height to put a torch under what ever small metal work that needs to be heated.   This stand is ideal for enameling copper, brass and silver or for annealing copper alloys for hammering and shaping.

IMAG3085

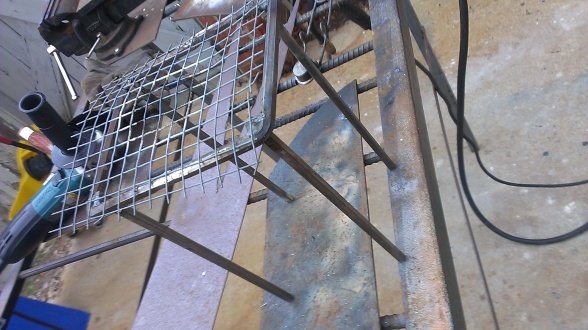
Here is the metal stand with a scrap piece of hardware cloth.  This offers a porous support for heating copper sheet for shaping, fold forming, and copper enameling.  Another way to utilize this versatile stand is a trivet.  This is a solid metal support.  If I need to heat with the oxyacetylene torch,  I need something stronger than hardware cloth.  That is because the intense heat from the torch can melt through and burn the wires of the hardware cloth too easily.  When I need a less intense heat, like for annealing copper, I use MAPP gas torch with the wire cloth.  Pictured below is the triangular trivet I made today.

2014-04-21 13.43.13

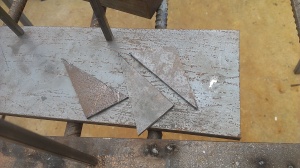
I want a triangular trivet in a tripod format.  The tripod shape allowed for both the maximum support and open area so I may have plenty of room to navigate my torch flame around the work to be heated.  I started by measuring three triangles from some scrap 16 gauge steel sheet.  Each triangle was 1 1/2 inch high and 2 and 3/4″ long.

2014-04-21 13.21.522014-04-21 13.33.12

Once I had all my triangles ready, It was time to weld them in the desired patter.  I brought out my heavy duty handmade fixture.  The idea was to temporarily tack weld the triangles into position  like so.

2014-04-21 13.36.122014-04-21 13.37.142014-04-21 13.38.55

The third triangle was welded instead at the vertex.  Then I used the angle grinder with a cutoff wheel on the first tack weld.  I was able to easily pry the newly made trivet off my welding fixture.  I proceeded to grind the surface smooth for the next task this fixture will be used.

2014-04-21 13.42.122014-04-21 13.42.15

Above you will see that I added reinforcing welds to both sides to increase the integrity of the trivet fixture.


Handmade Heavy Duty Welding fixture

2014-04-13 15.41.25

A Welders Helping Hand

If you have ever worked in electronics or know someone that has, you probably have seen one of those helping hand rigs.  They usually come with two alligator clips at the end of two articulated arms and a magnifier in the middle.  It is usually mounted on a base of substantial weight to stabilize it.

Well, at one point or another, a welder or metal smith will require some assistance.  A virtual third hand if you will.  That is how I came up with the contraption featured here.

2014-04-13 15.41.43

Some One Inch Steel Block and a Non-working Clamp

When I came upon this really thick block scrap, I knew it was destined for welding fixture use.  Just was not sure how I would approach the concept.  Once I had my stick welder plugged in and the blocks in my hand, it did not take long to come up with a plan.  I first wire brushed the two blocks and set the angle block on the larger rectangular one.  I then ran beads of weld all the way around to be sure they would NEVER part ways. The angle surface serves as a base where I can temporarily tack weld round or odd shaped objects to it to hold pieces steady while I weld other pieces to it freeing up one of my hands.  See the rear view for the angled block below.

2014-04-13 15.41.12

It was at this moment that I could make my fixture truly my own.  I remembered I had this old clamp that was crooked and never worked right.  I bought it at an auction to get the other two really nice ones.  Auctions have a funny way of putting duds in a lot to get rid of junk slyly.  Well, never fear, that clamp has a new purpose in life.

2014-04-13 15.41.55

I cut off the offending bottom piece and welded what remained on the block.  I will possibly modify this further in the future.  I am just now thinking of possibly cutting a 3 inch piece of 2inch angle iron and welding it upside down on the end of the clamp so it can hold tubing and well as flat metal objects.  More on this later.


Awesome Steel Storage Shelf

IMAG2976

Steel Shelf Handmade

With spring finally coming after one of the harshest winters of this generation, I feel the strong need to reorganize my tools and materials.  I looked for good used industrial shelving on craigslist but did not find much of interest.  the ones I found were either too big or too expensive.  I also did not want to commit to buying 25 units from a warehouse either.

The steel shelving sold at the local home improvement stores cost well over $100 and are not made of the most robust materials either.  So I set my sights on crating my own.  I could use stronger material  efficiently at a lower cost.  So I headed to Warner Steel to pick up some 14 gauge steel tubing and 2 inch by 1/8″ angle iron.

IMAG2947

To to save a little on weight and cut cost a little, I used 3/8 round bars as the end of the shelf units.  The angle iron sides will provide a suitable lip over the particle board shelves to help secure items stored.  Also, I left the shelf unit unfinished so I can easily make additions and modifications as I see fit.  It will be enclosed in a storage unit out of the elements so all is well.  When I am satisfied, I will paint the assembly with oil based enamel.  Until then, enjoy and don’t forget to check out my Etsy shop.

JB Weld Saves the Day!

IMAG2719


Two Part Epoxy Glue for the Toughest Jobs

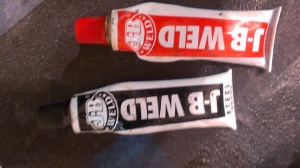
If you need to join two different materials together, or metal on metal, JB weld answers the demand quite nicely.  This two part epoxy provides an industrial strength bond and is relatively easy on the wallet.  In fact, when fully cured, the glue can only be removed by mechanical means such as grinding.  It is widly available at hardware and home improvement stores and is easy to mix.  Just sqeeze out equal portions of adhesive and catalyst and mix thoroughly.  It smells funny but is not overbearing and hardly noticeable.  The job I will discuss below was done with the JB weld for metals. 

IMAG2713

Busted Plastic Refrigerator Shelf

Me and my wife were really frustrated with the prospect of replacing a broken shelf that no longer could support storage.  The fridge was there when we bought the place nearly 10 years ago.  Who knows the difficulty or cost of finding a replacement shelf that covers the bottom crisper drawers.  Whats more is it is really hard to justify spending wads of cash on a fridge that can fail at any time.  So  I though like MacGyver and improvised. 

IMAG2715

Tools and Materials Needed

What I did was looked in the jungle that is my tool closet to find a solution.  The solution to my dilema presented itself as a lonely piece of 1/16 inch thick aluminum sheet scrap.  Very quickly, I realized how I was going about this improvised repair.  I needed a drill, drill bit, JB Weld two part epoxy, a Dremel rotary tool, aluminum scrap piece and a scrap piece of wood to use as a work surface. 

IMAG2716IMAG2718

Drill the Holes and Sand the Aluminum

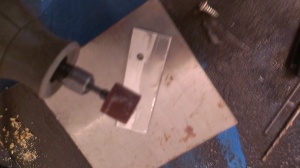
I loved the serendipity of this project.  Not only did I have the scrap aluminum that only needed trimmed by 1/2 an inch, I also found some sheet metal screws that I stashed from scrapping appliances.  I drilled two 3/16 inch holes in the trimmed aluminum sheet scrap where it would be mounted on the plastic frame.  The plastic felt cheap like it was likely ABS or polystyrene.  I knew if I drilled some holes a little smaller than the threads of the screw that I could manually screw them in like they were self tapping screws.  To do this, I drilled two matching 1/8 inch holes in the plastic frame.   The screws fit nicely into the aluminum but not to snug.  The real trick was getting a tight bond to the plastic.  I used an abrasive ginder bit on my Dremel to roughen up the underside of the aluminum plate.  This so the epoxy had a rough surface to bond to creating a much tougher bond. IMAG2720

Everything is in Place

I mixed up equal parts of epoxy with hardener in a portion the size of a dime.  I applied some to the roughened side of the aluminum, dropped in the screws, and positioned it onto the frame  so the screws would line up with the holes.  I promptly tightened the screws until they were tight.  This served two purposes, one it created a bond with the plastic, and two, it applied pressure to the aluminum plate against the frame.  This in important in gluing to clamp work pieces together tightly.  It squeezes out air bubbles but also creates a thinner adhesive layer assisting in shorter drying and curing times. 

After it was in place, I let the shelf air cure at room temperature for 24 hours.  I reinstalled in fridge, and placed the glass back on it.  Although not asthetically pleasing, it is as good as new.