
Iridescent Topcoat Applied
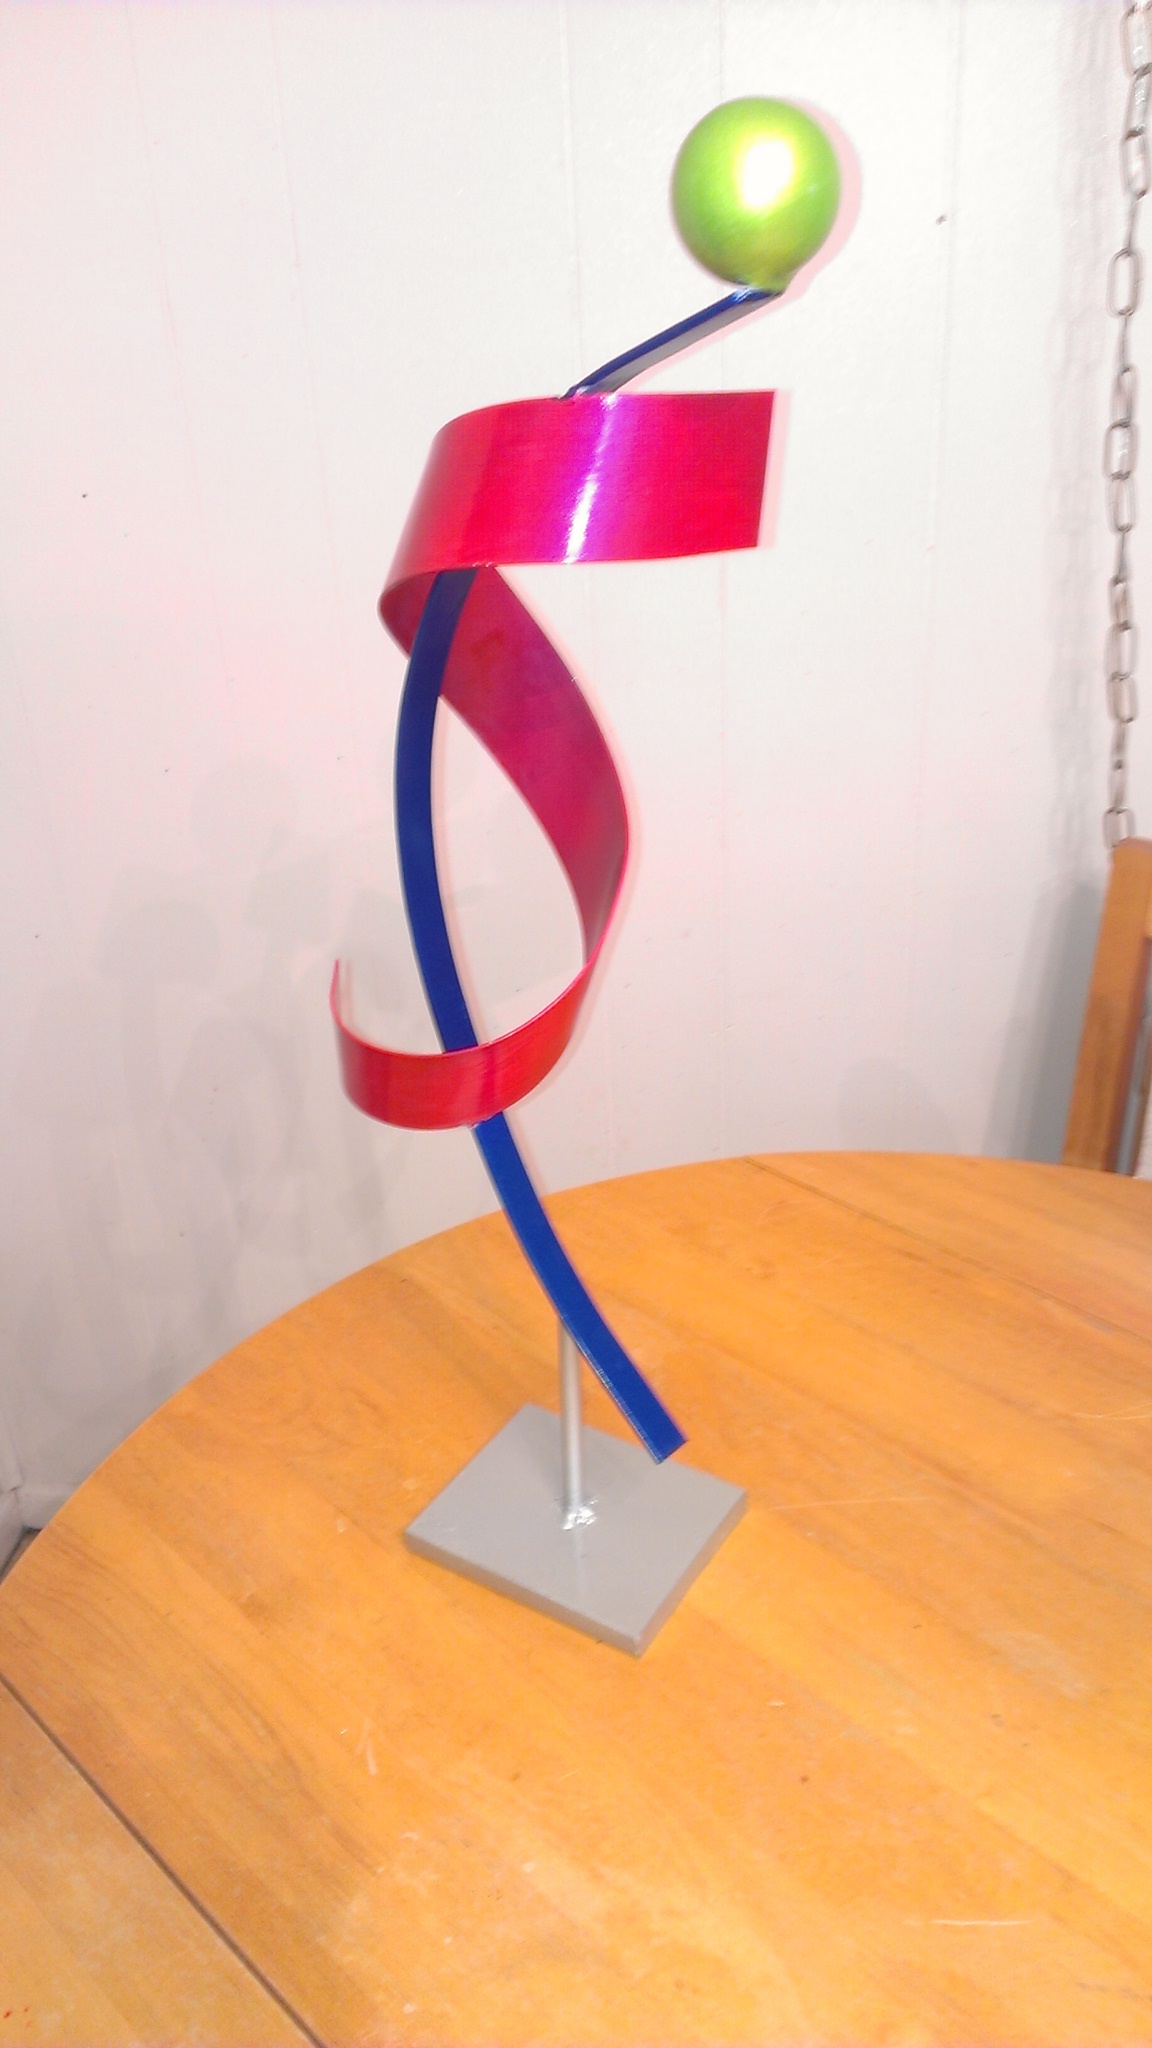
In the first part of this blog entry on Whimsicle Curves and Spirals, I covered the welded construction followed by a base coat to tone the finish. By far the most spectacular result was observed while airbrushing the magenta Pearl Ex onto the magenta base coat. Note the hot pink shade with purplish iridescence in the photo below.

This really brings focus to the sculpture. The interior supporting curve needed a pearl finish but more subdued. The Createx pearl blue airbrush paint was well suited for this task.


Continuing in my theme of using different colors for the bases, I applied a Createx silver pearl to the base. Not as reflective as I like yet still nice. I first dry brushed a grey base coat to assist with bonding and toning of the top coat.

Pearl Lime Sphere
Originally, I was just going to paint the solid steel ball gold. Seeing that the base was silver, I thought it would dull the effect of the eye popping fushia spiral I worked so hard to create. I remembered I had a small bottle of pearl lime airbrush paint. This stuff looks fluorescent it is so bright. It blows most golds right out of the water.
This colorful sculpture will bring bling to any decor. It is available in my Etsy shop.
Related articles
- Whimsicle Curves and Spirals (jtbmetaldesigns.wordpress.com)
- An Iridescent Abstract Table Sculpture (jtbmetaldesigns.wordpress.com)
- Airbrushing Mica Powders in Acrylic Medium (jtbmetaldesigns.wordpress.com)
- Tips for Your Best Airbrush Tan Yet! (studiourbanwax.blogspot.com)

[…] results of those finishes can be seen on the second part of the whimsicle curves post. This post will concern itself with the support base for the whimiscle curve sculpture. I […]